DIY Painting Guidelines
Learn how you can paint your home like a pro
Here’s all you need to know before you paint your home on your own.
Painting involves three stages:
- Pre-painting work
- Surface preparation
- Painting
The processes vary according to the surface. Pick a surface and understand just how you need to prepare the surface and paint it right.
Interior Pre-painting
Deal with Dampness
Check the surface thoroughly for dampness or seepage of water. In the case of seepage, correct it by repairing pipes or cracks that are causing the issue.
Fix the plaster
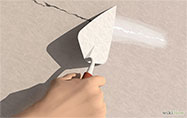
Check if the plaster is loose by tapping on the wall. If it is loose, it will sound hollow. Remove the loose plaster, fill all the cracks on the surface and re-plaster the surface with broken plaster.
Cure it adequately
Allow the surface to cure for at least one to three weeks, depending on the extent of re-plastering. This is essential for the surface to dry properly. It also allows the surface to stabilise and smoothen, and cracks to be bridged.
Interior Wall Surface Preparation
Newly plastered surfaces must be left to mature for at least 1-2 months. New plasters sometimes ‘pop’, however, this can be taken care of during painting.
Remove loose particles and paint flakes. Sand away the dust, dirt and grease. Scrape off old coatings if the paint film is not intact.
Once you have sanded the surface to remove the gloss and sheen, you can retain older coatings of oil or synthetic emulsion paints, if they are in a good condition. Remove cracked or flaked paint completely.
Treat fungus-affected areas with a solution of bleach, or use a specialised fungicidal solution. Apply it on affected areas with brush or sponge. Wash the walls with clean water after an interval of 8-10 hours. Allow the surface to dry sufficiently.
Interior Wall Painting
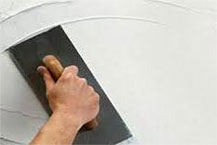
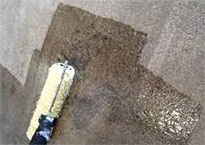
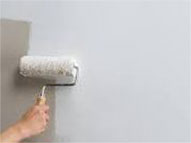
Apply a coat of wall primer. Fill and level any minor undulations on the wall with an application of Stucco. It’s necessary to sand after the filling or stucco application, to ensure that the surface is smooth and uniform.
Exterior Pre-painting
It is extremely important to carry out all repairs and correct any imperfections on the exterior walls before painting.
Fill cracks
Cracks are very common on exterior walls, especially of older buildings. Do not apply filling compound if the cracks are large. Instead, fill the cracks with a 1:3 cement and sand mixture.
Deal with dampness
Check all external drainage pipes for rusting or leakage. Fix faulty plumbing. Make sure that there are no leaks or gaps in the roof. Check for cracks near edges and around water storages. Make the ceiling watertight to enhance the performance of the painted surfaces.
Exterior Wall Surface Preparation
Cure and clean
Allow newly plastered surfaces to cure for at least 3-6 weeks before painting. Remove all dust, grease and loose materials to help the paint last longer.
Treat microbe growth
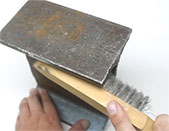
Fungal and algae growths must be removed completely. First brush vigorously with a wire brush and then clean it with a bleaching powder solution in water (dissolve 10% bleaching powder in 1 litre of water, filter the solution and apply with a brush or sponge) or fungicidal solution. Treat the top of awnings, sunshades, parapets and other horizontal surfaces where dampness is likely to accumulate.
Attend to previous coats
Sand previously oil-painted surfaces thoroughly to remove loose particles. Sanding also makes the coating dull and matte, this promotes better adhesion. Rough exterior surfaces, which have been coated with textured paint, must be wire-brushed and washed with water thoroughly and dried completely. Ensure that the surface is free from chalking. Make sure the exterior surface is not affected by dampness.
Exterior Wall Painting
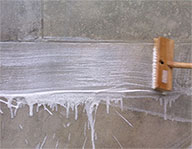
Apply a liberal coat of exterior wall primer as recommended. Apply recommended coats of exterior top coat, with adequate drying time between coats. Horizontal surfaces like the tops of awnings and parapets must be given an additional coat for greater protection.
Metal Pre-painting
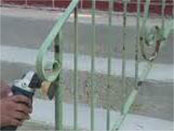
Remove all dirt, dust, grease, rust and moisture from the surface. Cover areas that will not be painted with masking tape, paper and/or cloth.
Metal Surface Preparation
Ferrous metals
De-grease and remove rust from ferrous metal substrates with suitable treatment. Apply a corrosion-resistant metal primer on ferrous metal substrates either by brushing or spraying. If necessary, use a filler to even out dents and correct surface imperfections. Make sure that the surface is free of moisture and loose matter. Apply one more coat of a corrosion-resistant metal primer by brushing or spraying, to cover the puttied areas. Allow the primer coat to dry for 6 hours and then sand with emery paper before applying successive coats.
Non-ferrous metals
Pre-treat non-ferrous metal substrates like aluminium, tin and galvanised iron, tin, etc. with a wash primer.
Metal Painting
Allow the primed surface to dry overnight. Apply the recommended top coat using the appropriate thinner. For best results, apply two coats allowing eight hours of drying time between two coats. The first coat should be wet sanded with waterproof emery paper before applying the second coat.
Wood Opaque Finishes:
Wooden Surface Preparation
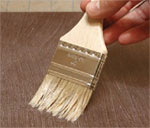
Be sure to sand previously painted wooden surfaces thoroughly, to remove dust or grease. Prepare the wood primer as per the recommended ratio and apply it with a brush. Apply the putty or lambi after 6-8 hours of drying. Sand the surface again and apply a second coat of the wood primer.
Wood Painting
For opaque finishes, choose conventional enamels and apply it by brushing or spraying. When using enamel, make sure you paint in a dust-free environment as it will take longer to dry. Usually, two coats are sufficient. However, if you are repainting with a lighter shade, you may need an additional coat.
Transparent Finishes: Wood Surface Preparation
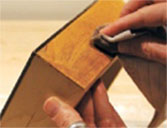
Season the wooden surface to be painted, as this will prevent deforming of the wood in extreme temperatures. Sand new wooden surfaces in the direction of the wood grain, so that the surface is smooth. Apply a suitable wood filler, in order to fill the grains and pores. Do remember that the filler is not meant to be used like putty and the leftover filler must be carefully removed by going along the direction of the grain. Repeat after half an hour, if you think it is necessary. Allow it to dry for 2-3 hours. Sand the filled surface, if needed.
New wood Painting
New wood surfaces that to be coated must be free of dust. Choose a transparent coating such as Touchwood. Apply 2-3 coats of topcoat to achieve great looking gloss.
Pre-polished wood Painting
Sand the surface along the grain with emery paper to get a smooth uniform surface. If staining is desired, completely remove the old finish. Wipe the surface free of loose dust. Continue with the finish paint coats as explained above.
Have some painting tips of your own? Comment to share them with us.
Also Read: Best Wood Stain Colours & Expert Tips
-
Get Inspiration
-
Make Your Plan

Let us design a project plan
to suit your needs.
-
1320 Colour Fandeck

Choose from over 1800 original hues.
dealer locator
Note:-
The shades displayed on this website are indicative only and may vary from the actual colours due to variance in monitor calibration and resolution as well as screen settings.

